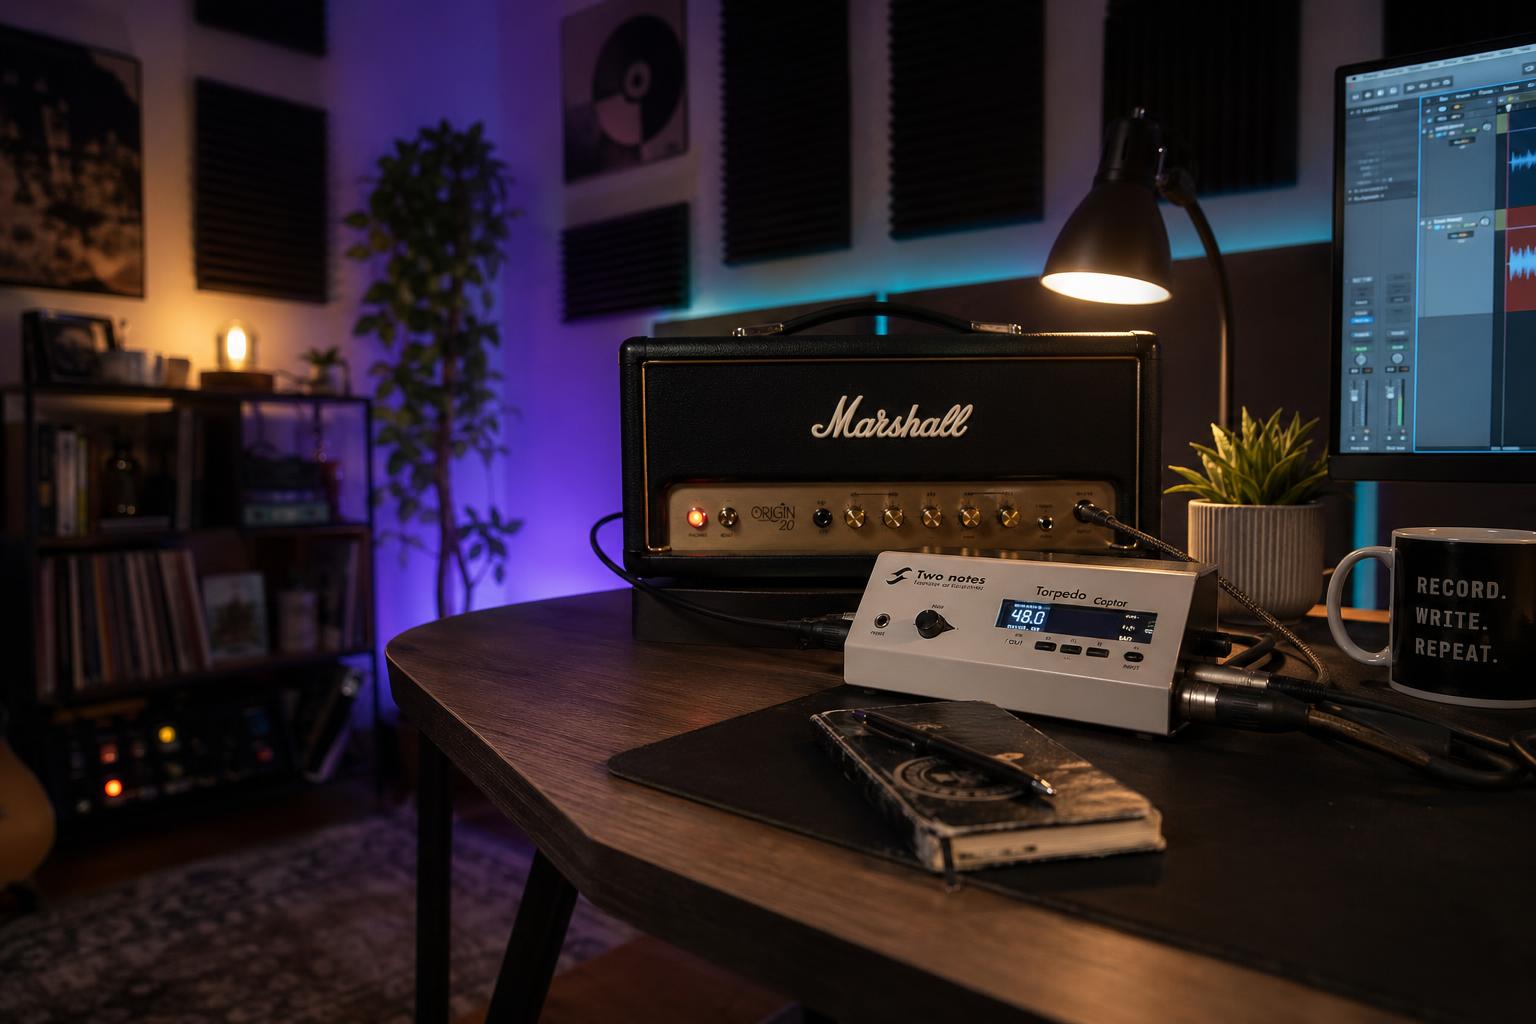
The signal chain in one sentence: Tube amp speaker output → Two Notes Captor (reactive load + line-level DI tap) → balanced line input on your audio interface → DAW track with a cabinet IR plugin loaded as the first insert. The amp's speaker is either disconnected or routed through the Captor's pass-through. Headphones go to the interface, not the Captor. There is no microphone, no cabinet, no amplified room sound. Just the amp's actual signal, captured the way a microphone would have captured it, but cleaner and repeatable.
I don't own a tube amp. My entire personal rig is direct via Quad Cortex. But I've been the one in my Discord who gets asked to write up the silent recording workflow every time another friend buys a Two Notes Captor and gets stuck on step three, and after writing the same answer for the fourth time last month I decided it was time to just publish it.
I've set up four Captor rigs for friends in the last year: two Captor 8s (passive), one Captor X (active with built-in IR loader), and one Torpedo Studio (the rack-mount older sibling). The signal chain is always essentially the same. The sticking points are always essentially the same. Here is the workflow, end to end, with the parts that actually trip people up explicitly called out.
What You Need Before You Start
| Item | Notes |
|---|---|
| Tube amp | Any wattage works with the right Captor variant; passive Captor handles up to 100W |
| Two Notes Captor (8 or X variant) | Passive 8 handles speaker load + DI; Captor X adds IR loading and headphone out |
| Audio interface with line-level input | Focusrite Scarlett 2i2 or better; the Captor outputs balanced line, not mic level |
| Speaker cable (NOT instrument cable) | Goes from amp speaker out to Captor; using an instrument cable here can damage the amp |
| 1/4" TRS or XLR cable | From Captor DI out to interface line in |
| DAW with IR loader plugin | Native plugins work fine: Logic Space Designer, Ableton Convolution Reverb-style IR loaders, or any third-party (NadIR, Ignite Amps NadIR is free) |
| Cabinet impulse responses | Some come bundled with the Captor X; otherwise free libraries from Mercuriall, Two Notes Wall of Sound, or paid libraries from Ownhammer or 3 Sigma Audio |
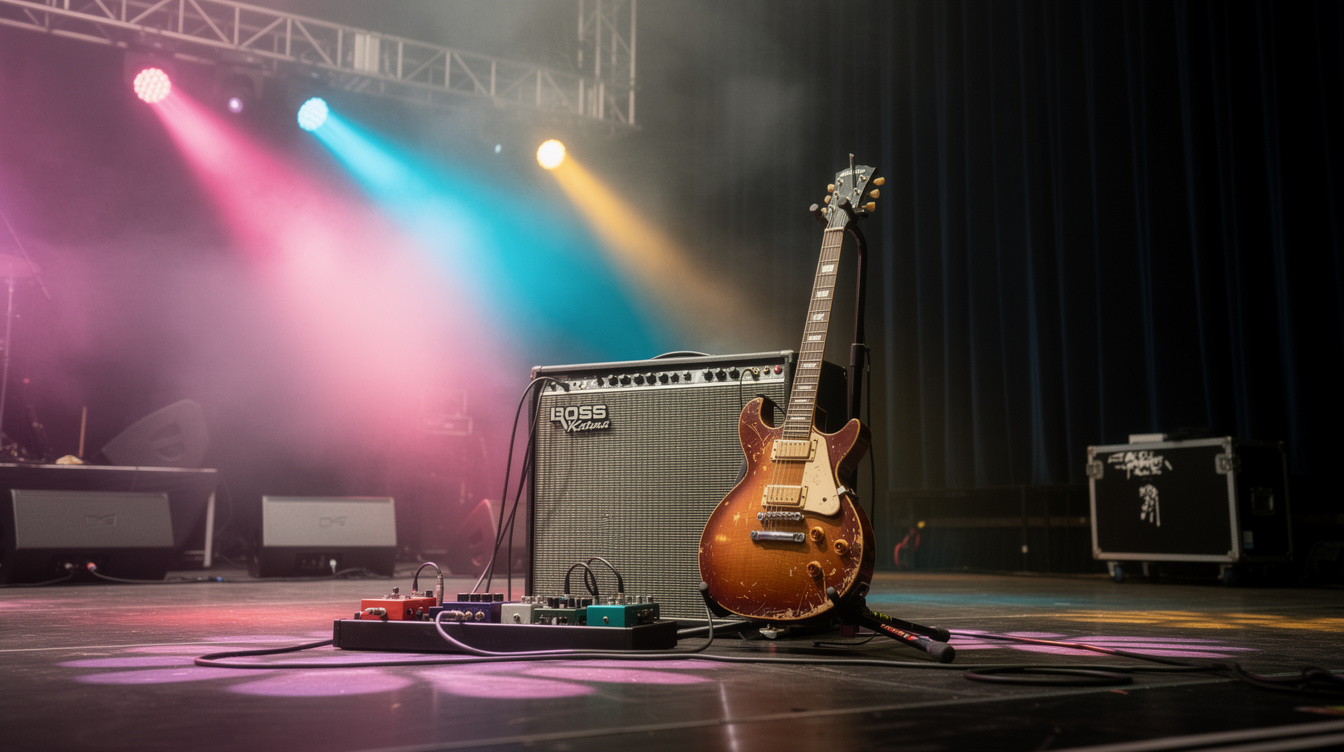
The single most expensive mistake I've seen people make is using an instrument cable instead of a speaker cable to connect the amp to the Captor. Instrument cables have higher capacitance and lower current handling than speaker cables, and running tube-amp-level current through them can damage both the cable and the amp's output transformer. Use a proper 1/4" speaker cable. They look identical from the outside but the internal construction is meaningfully different. If your speaker cable is 30 years old and you've been using it for amps, it's correct. If it came from a "stage cable kit" labeled for instruments, it's wrong. Check before you connect anything.
Step 1: Match the Impedance
Every tube amp has an output impedance (usually 4, 8, or 16 ohms, selected by a switch on the amp or by which speaker output jack you use). The Captor must be matched to that impedance. Mismatching can damage your amp's output transformer.
The Captor 8 is fixed at 8 ohms. If your amp's output is 8 ohms (most common), you're set. If your amp is set to 4 ohms or 16 ohms, you need to either change the amp's impedance setting or buy the appropriately-rated Captor variant (Two Notes makes 4-ohm and 16-ohm versions in addition to the 8).
The Captor X has selectable impedance via a switch on the unit itself (4, 8, and 16 ohm modes). Match it to your amp's output.
| Amp output | Captor needed |
|---|---|
| 4Ω only | Captor 4 or Captor X (set to 4) |
| 8Ω only | Captor 8 or Captor X (set to 8) |
| 16Ω only | Captor 16 or Captor X (set to 16) |
| Switchable amp (Mesa, some Marshalls) | Captor X is most flexible |
I had a friend run his Mesa Mark V at 4Ω into a Captor 8 for two months before he caught it. The amp survived because he was playing at low volumes, but this is the kind of mistake that destroys output transformers under load. Don't skip this step. Confirm impedance before you connect anything.
Step 2: Connect the Amp to the Captor
Power off the amp. Always. Never connect or disconnect speaker cables with the amp powered on. Tube amps must always have a load connected when the power is on, and the moment of disconnection while powered can spike voltages that damage the output transformer.
Take a speaker cable. Connect one end to the amp's speaker output jack (matching impedance per Step 1). Connect the other end to the Captor's "From Amp" or "Speaker In" input. The Captor is now serving as the amp's load; it presents the amp with the resistance and reactive impedance it expects to see from a real speaker.
If you want to also hear the amp through its actual cabinet (for hybrid silent-and-amped use), the Captor's "To Cab" or "Speaker Through" output goes to the speaker cabinet via a second speaker cable. The cab and the Captor's load operate in parallel; the amp sees the combined load, and the Captor's DI tap captures the signal whether the cab is connected or not.
For pure silent recording, leave the "To Cab" output disconnected. The amp's energy is dissipated entirely into the Captor's load resistor, and no sound comes from a speaker. The amp will get warm; the load is converting all the amp's output power into heat. This is normal. Don't put anything flammable on or near the Captor while it's working.
Step 3: Connect the Captor's DI Output to the Interface
The Captor has two outputs: a balanced 1/4" TRS line output (sometimes also an XLR DI output, depending on variant). One of these connects to your audio interface's line input.
If your interface has a 1/4" line input (most do; Focusrite, MOTU, RME, Apollo all support this), use a 1/4" TRS cable. The Captor's output level is line-level, not mic-level, so you don't need preamp gain. Set the interface's input level so the Captor's signal peaks around -12 dBFS to -6 dBFS at the loudest part of your playing. Leave headroom. Tube amps push line-level outputs harder than people expect.
If your interface only has XLR mic inputs, you can use the Captor X's XLR DI output (some passive Captors don't have XLR, so check your variant) and set the preamp gain to its lowest setting. Don't engage the +48V phantom power; the Captor is a passive output and phantom power can damage some passive electronics.
Common mistake: people plug the Captor into the interface's instrument-level "Hi-Z" input. Don't. The Hi-Z input is for guitars and basses (high impedance, low signal level). The Captor outputs at line level (low impedance, much higher signal). Using a Hi-Z input creates impedance mismatch and either a hot signal that distorts the interface preamp or a thin/small signal depending on how the interface handles it. Use a line input.
Step 4: Load a Cabinet IR in Your DAW
This is where the workflow goes from "I have a signal" to "I have a recordable guitar tone." Without a cabinet impulse response, the Captor's DI signal is the raw amp output (what the amp's preamp and power section produced before the speaker shaped it). Speakers do enormous frequency-domain work (rolloff above 5 kHz, presence peaks in the 2–4 kHz range, specific resonance signatures from the cabinet itself). Without an IR, you're hearing the amp without that shaping, which sounds harsh, brittle, and nothing like a recorded guitar tone.
Open your DAW. Create an audio track with the Captor's input as the source. Add an IR loader plugin as the first insert on that track. Load a cabinet IR file (.wav format, usually 24-bit/48 kHz). Set the IR loader's mix to 100% wet. The signal flows: Captor DI → IR convolution → output bus.
Recommended free IR loaders:
- Ignite Amps NadIR: free, Mac/PC/Linux, supports stereo IRs, simple interface
- LePou LeCab2: free, supports up to 6 IR slots simultaneously for blending
- Two Notes Wall of Sound: free version available, ships with several cabinet emulations (the same as the Captor X's built-in IR engine, but in plugin form)
The Captor X has IR loading built in, so you can load IRs onto the unit itself and the DI output is already speaker-emulated. If you're using a Captor X, you don't need a separate IR plugin in the DAW (though you can use one for additional shaping).
For the rest of this guide I'll assume Captor 8 (no built-in IR) workflow, since it's the more common setup and the Captor X workflow is a simplification of the same chain.
Step 5: Choose the Right IR
This is the step where most people stall. There are thousands of free IRs available, and choosing the right one for your amp is the difference between a recording that sounds like the amp you actually own and one that sounds like a generic high-gain tone someone else built.
Match the IR to what your amp's real cabinet would be. If you're recording a Marshall JCM800 head and you'd normally pair it with a 4×12 loaded with V30s or Greenbacks, choose an IR of that exact cabinet configuration. Most IR libraries are organized by cabinet model (Marshall 1960A, Mesa Rectifier 4×12, Vox AC30 2×12) and microphone type (SM57, R121, U87) and microphone position (cap edge, center, off-axis).
For a starting point that almost always works:
- Cabinet: Match what the amp would actually be paired with
- Microphone: SM57 (the canonical guitar amp recording mic)
- Position: Cap edge, slightly off-axis (the standard close-mic position for most amps)
- Distance: Close (1–2 inches from the speaker)
Two Notes' bundled IRs are a good starting point for users new to the workflow. They're voiced for general musicality rather than absolute realism, which makes them easier to land usable tones quickly. Once you're comfortable with the workflow, third-party libraries (Ownhammer, 3 Sigma Audio, York Audio) offer more cabinet-specific accuracy at the cost of more decision-making per track.
I keep a folder on my desktop called IRs_starter_pack with eight cabinet IRs covering the main amp categories: Fender 1×12, Fender 4×10, Marshall 4×12 V30, Marshall 4×12 Greenback, Mesa 4×12 V30, Vox 2×12 Blue, Bogner 4×12, and Friedman 4×12. When a friend asks "which IR do I start with," I send them the folder and tell them to match the IR to their amp's logical cabinet pair. It works almost every time.
Step 6: Set Up Headphone Monitoring
The Captor itself is silent; it converts amp output to heat and signal. To hear what you're playing, you need to monitor through your audio interface's headphone output, with the IR-loaded DAW track routed to the headphone bus.
Set the interface's monitoring mode to "DAW" or "playback" (not "direct" or "input"). Direct monitoring on most interfaces routes the input signal straight to the headphone output without going through the DAW, which means it bypasses the IR plugin and you hear the raw, harsh, un-speaker-emulated amp signal. The processed signal you actually want to hear has to come back from the DAW, which means you need DAW monitoring with the IR track armed.
A few interfaces have very low monitoring latency (RME UCX II, Apollo Twin) that makes DAW monitoring feel as responsive as direct monitoring. Most interfaces have some monitoring latency (typically 5 to 15ms) that you'll notice if you're sensitive to it. For most practice and recording, this is acceptable; for serious tracking sessions where you need zero-latency feel, look into the Captor X variant which has a built-in headphone amp with the IR engine running on the unit itself, bypassing the DAW round-trip.
The Captor X's headphone output is the cleanest way to monitor for tracking. The signal path is amp → Captor X load + IR engine → headphone amp → your ears, with no DAW involved. This is the workflow I'd choose if I were buying a Captor today. The X variant's slightly higher price ($499 vs. $279 for the Captor 8) is worth it for the integrated IR engine and headphone monitoring alone.
Step 7: Record
The interface's input now contains the amp's IR-shaped signal. Arm a DAW track. Hit record. Play. The recorded file is a guitar tone identical (within the limits of the IR's accuracy) to what a microphone would have captured from a real cabinet, but without the room sound, the bleed from other instruments, the mic positioning compromises, or the volume.
The recording is repeatable. The same amp settings, the same Captor settings, the same IR file produce the same sound every session. This is the part of the workflow that mattered most to me when I started thinking about recommending it to friends. A microphone-on-cabinet recording is almost impossible to reproduce. The room changes, the mic moves a millimeter, the cab resonates differently in a different temperature. A Captor + IR recording is deterministic. You can come back two months later and pick up exactly where you left off.
For overdubs and re-amping, the Captor's DI signal can also be recorded dry (without the IR) on a parallel track, and the IR can be applied later non-destructively. This lets you change the cabinet emulation after the take is done. This is useful if you decide the Marshall 4×12 IR you used was too aggressive and you want to try a Greenback IR instead. The dry signal is the source; the IR is the post-processing.
Common Issues and How to Fix Them
The signal sounds thin and harsh. You probably haven't loaded an IR, or the IR is at less than 100% mix. The Captor DI without speaker emulation is brittle; it needs the IR's frequency shaping to sound like a guitar tone.
The signal is distorted at the interface. Reduce the amp's master volume or the interface input gain. The Captor outputs a healthy line-level signal; you don't need to push the interface preamp.
The signal is too quiet. Check that you're using a line input, not a Hi-Z input. Hi-Z inputs typically attenuate line-level signals by ~20 dB. Switch to the line input and the level should normalize.
The amp sounds different from how it sounds through a real cabinet. It will, somewhat. The IR is a frozen snapshot of one specific cabinet + mic + position combination. Real cabinets vary moment to moment based on room acoustics and mic placement. The IR signal is more consistent but less "alive" than a mic'd cab. This is a feature for recording (consistency) but a perceived limitation for live amped playing (less of the room interaction). Try a different IR before concluding the workflow is wrong. A different mic position or cabinet emulation can dramatically change the perceived realism.
The amp gets very hot. Normal. The Captor is dissipating the amp's full output as heat. Don't cover the Captor while it's working, don't put it on a thermal-sensitive surface, and let it cool down between long sessions. The unit is rated for continuous operation but it does run warm.
There's a hum in the signal. Likely a ground loop between the amp and the interface. Try plugging both into the same power outlet. If the hum persists, the Captor X's optional ground lift switch can help (the passive Captor 8 doesn't have one, but the same ground loop fix usually solves it externally).
How Close It Actually Gets to a Mic'd Cabinet
I went into the first Captor setup expecting it to feel like a compromise. I'd assumed that any system trying to capture a tube amp's sound without a microphone and a real cabinet would have an obvious "DI'd amp" character (that brittle, processed feeling that you can hear in early amp simulator recordings). I was prepared to tell my friend it was an okay solution but he'd want to mic the amp eventually for "real" recording.
What I actually heard, after loading a decent IR (Two Notes' bundled Marshall 1960A V30 close-cap-edge IR, in this case), was a recorded signal indistinguishable in any meaningful way from a SM57'd cabinet I had recorded the same week using the same amp. Not "close." Not "almost." Indistinguishable in a blind A/B that I ran on my own monitors with the volumes matched. The IR + Captor signal was actually slightly cleaner because there was no room or mic-positioning variability adding inconsistency between takes.
The lesson, which has shifted how I think about tube amp recording: the IR is doing 95% of the perceived work that a microphone+cabinet does. The remaining 5% (room interaction, mic-positioning artifacts, air movement) is real but not load-bearing for most music. For home recording, where the goal is a usable consistent guitar tone rather than a ritualistic recreation of a 1970s recording session, the Captor + IR workflow is functionally equivalent to mic'd cabinet recording. I built a reference document for my Discord group that recommends Captor + IR over mic'd cab for any home studio under 200 square feet, because the room is going to add more inconsistency than the IR removes. That recommendation has held up for a year and counting.
If you've been resistant to silent recording because you assumed it would sound like a compromise, set up a real Captor session (not the YouTube demo, an actual recording with a decent IR) before you make up your mind. The technology has gotten good enough that the old objections aren't quite right anymore.
The Captor + IR workflow is the most consistent silent-recording solution I've helped friends set up, and the gap between what it produces and what a mic'd cab produces is smaller than the silent-recording skeptics tend to claim. If you have a tube amp you can't crank in your space, this is the workflow. The first session takes an afternoon to dial in. Every session after that is plug-in, hit record, get the same tone you got last time.